How
to Assemble an EL model Electone
(to take it
apart do everything in reverse)
|
1. Pass the Power Cord through the Pedalboard Unit and secure it by the clamp |
Click pics for larger view |
|
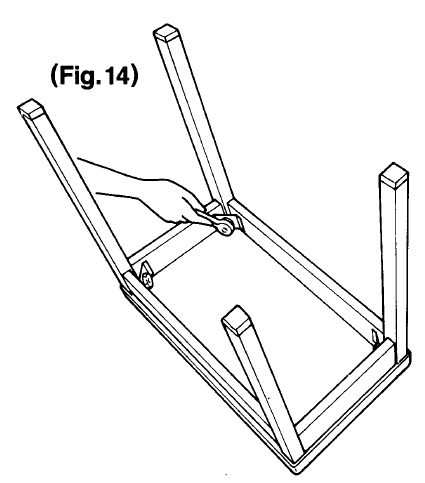
Stand the
Pedalboard Unit up as shown in Fig.1. |
|
|
|
|
|
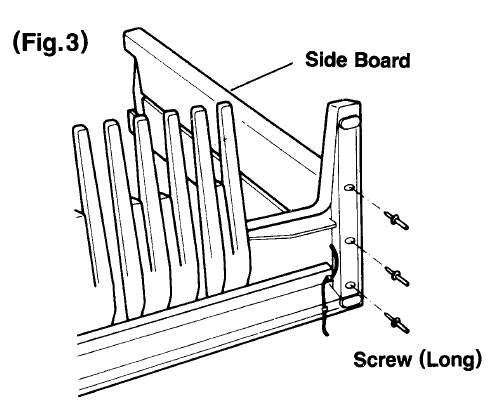
2. Fix the Side Boards to the Pedalboard Unit |
|
|
Fit the Side
Boards against the Pedalboard Unit as shown in Fig 3. |
|
|
|
|
|
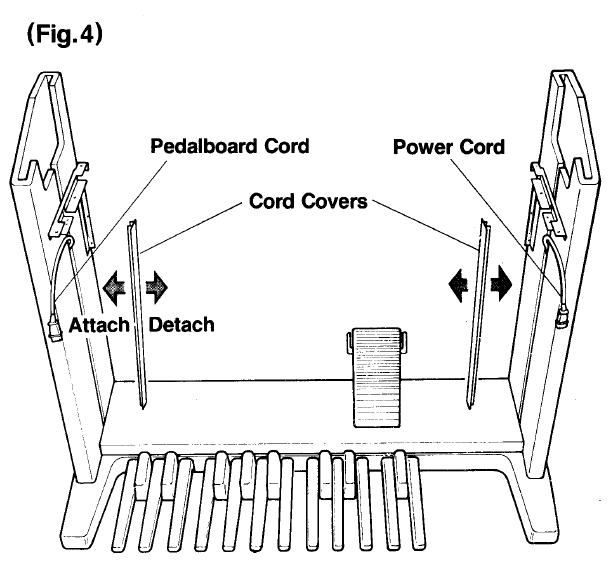
3. Insert the two Cords into their grooves, then attach their Cord Covers. |
|
|
Detach the
Cord Covers attached to the Side Boards Slide each Cord Cover as far down as possible along its groove. |
|
|
|
|
|
4. Speaker Unit & Cords |
|
|
Starting from the back of the assembled stand, slide the speaker unit in place along the brackets, keeping both cords (the power cord and the cord from the Pedalboard) down from the top of the cord covers. |
|
|
|
|
|
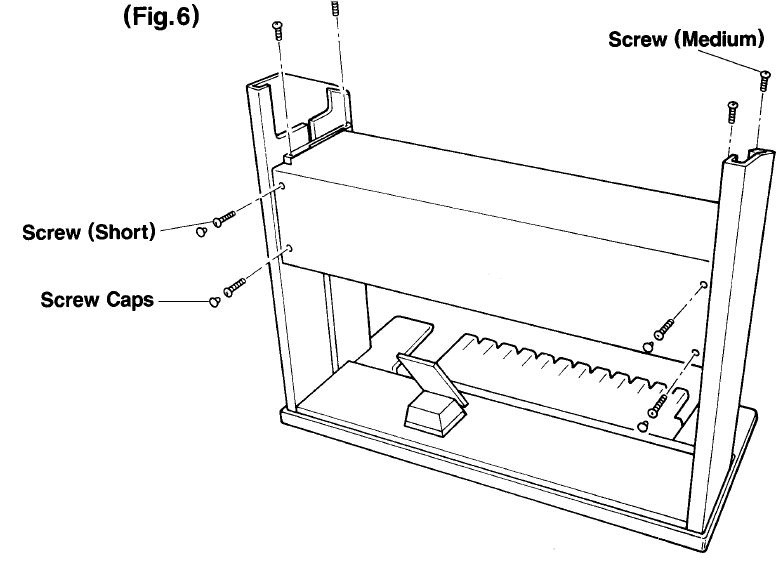
5. Cords |
|
|
Mount the
speaker unit onto the top of the sideboards with the four medium-sized
screws. Fasten the four short screws to the back of the speaker unit and cover each screw with the four screw caps. |
|
|
|
|
|
6. Cords |
|
|
Drape the three cords (the power cord, the cord from the Pedalboard and the cord from the speaker) in front of the speaker unit. |
|
|
|
|
|
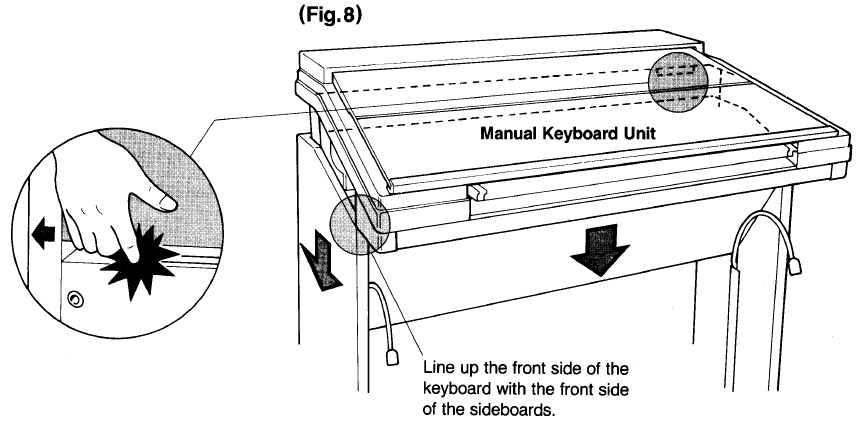
7. Fit Keyboard |
|
|
Carefully fit the keyboard into the sideboards, taking care not to pinch your fingers. |
|
|
|
|
|
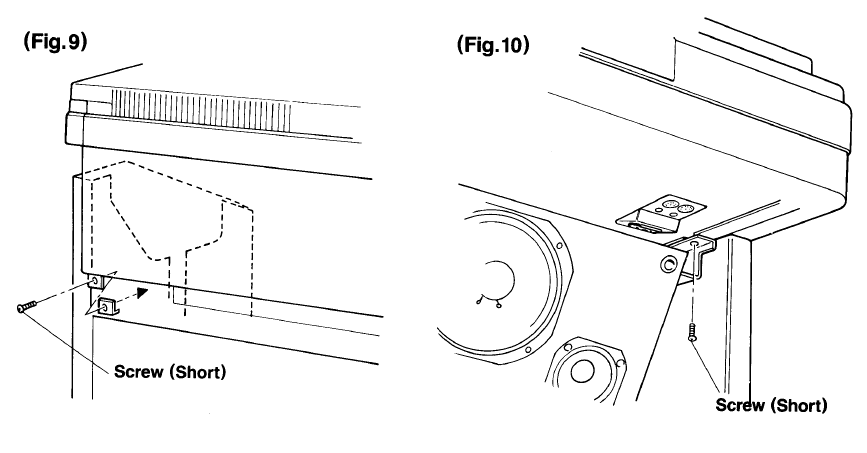
8. Keyboard |
|
|
Secure the keyboard by fastening the four remaining short screws. |
|
|
|
|
|
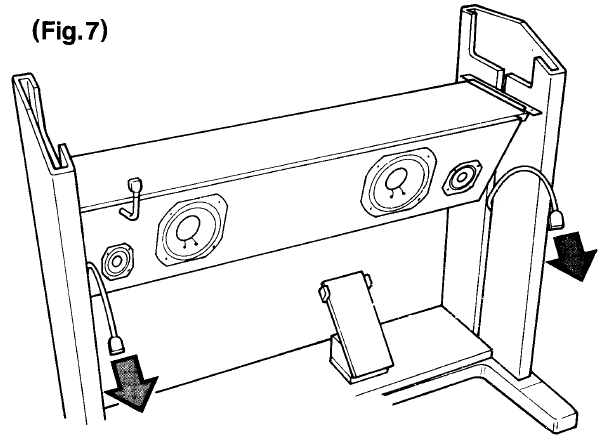
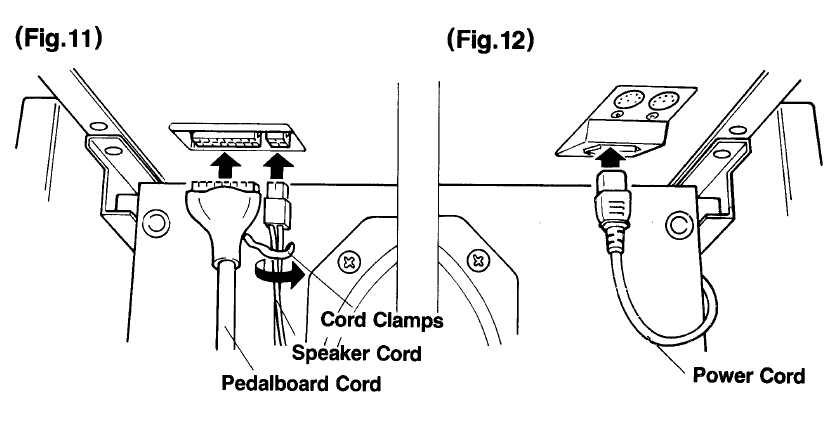
9. Speaker & Pedalboard cords |
|
|
Connect the chords as shown in the picture on the right. |
|
|
|
|
|
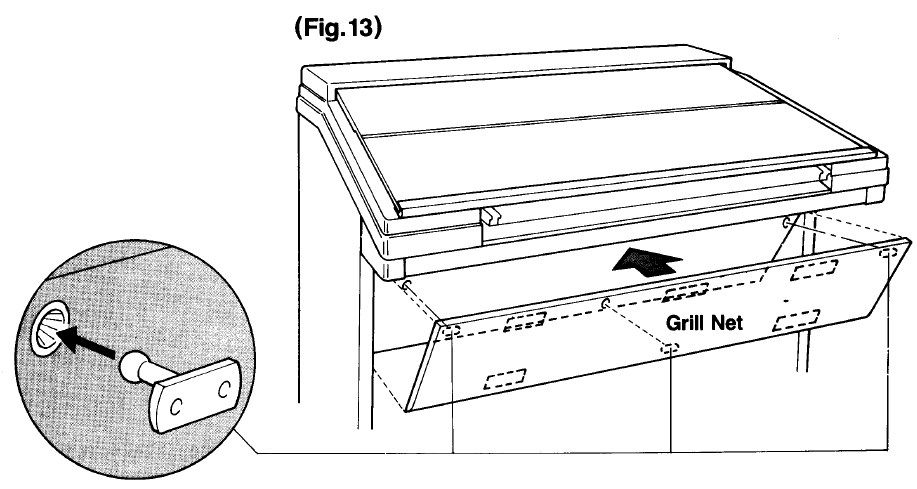
10. Speaker Grill |
|
|
Finally, attach the grill net to the speaker unit. Align the three tabs on the grill net to the slots on the speaker unit, and secure the net with the velcro tape. |
|
|
|
|
|
11. Assembling the Bench |
|
|
Turn the bench
upside down and place it on the floor. |
|
|
|
|
|
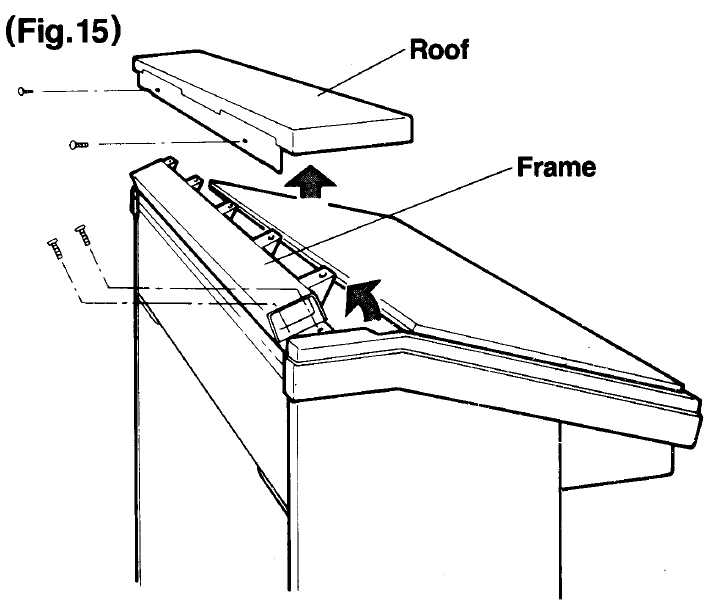
12. Top Cover |
|
|
If anything falls into the gap between the Cover and the Manual Keyboard Unit, remove the two screws that secure the roof of the Manual Keyboard Unit, lift of the roof (covering), then remove the fallen object. More details... |
|
|
|
|
|
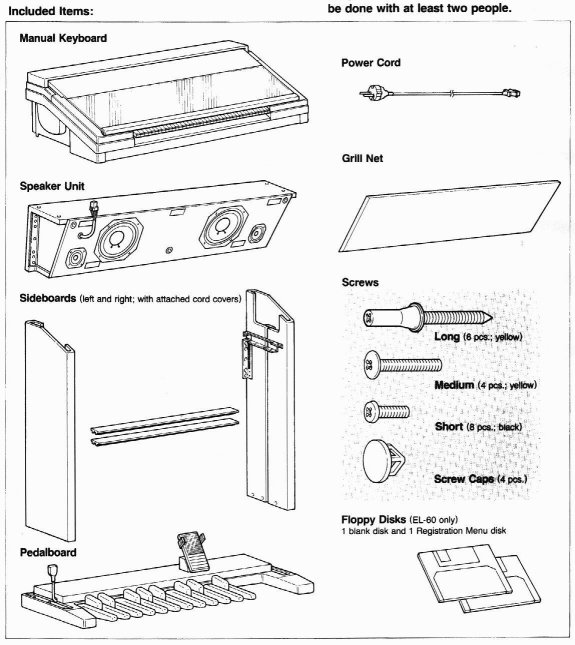
Included Parts |
|
|
Shown in the picture on the right are all the items that should be included in your package. If you are going to take the Electone apart make sure you keep all of the small parts in a safe place (put them into a container of some sort. |
|